Create a Social Media Calendar with Picmaker: A Step-by-Step Guide. Easily create a social media calendar with Picmaker! Follow our simple step-by-step guide & boost your social media game today!

<<<<< Buy Now from Official offer >>>>>
Why a Social Media Calendar is Essential
Creating a social media calendar is crucial for any business or individual. It helps streamline your marketing efforts & ensures that you remain consistent. With a comprehensive plan in place, you can keep track of your posts, campaigns, & engagement efforts. This strategy helps in enhancing your online presence & reaching your audience effectively.
Without a calendar, it’s easy to lose track of your goals. You may post sporadically or miss important dates. A social media calendar allows you to organize your content, ensuring timely delivery. It acts like a roadmap for your campaigns, making it simple to visualize your plans.
And another thing, a social media calendar enables you to assess your performance. You can analyze what worked & what didn’t. This process helps in refining your strategy over time. A calendar also aids in collaboration for teams. Everyone knows their roles & deadlines, improving overall efficiency.
Incorporating tools like Picmaker makes this process simpler. You can create visually appealing content while managing your calendar. A well-structured calendar saves time & reduces stress. You’ll find it easier to brainstorm ideas & maintain a steady flow of content.
When you have a plan, your social media presence becomes more engaging. This not only increases your follower count, but also builds brand loyalty. You’ll find that consistency helps to establish authority in your industry.
In my first experience creating a social media calendar with Picmaker, I was amazed at how organized my content became. I had a clear view of my posting schedule, which kept my content strategy on track.
Key Components of a Social Media Calendar
A successful social media calendar includes various components. First, it should outline the types of content you plan to share. This could range from promotional posts to educational articles or user-generated content.
Next, you must specify the platforms. Different platforms have unique audiences. Tailoring your content for each one ensures better engagement. Common platforms include Facebook, Instagram, Twitter, & LinkedIn.
Another critical component is the publishing schedule. Determine how often you want to post on each platform. Consistency matters; therefore, you can opt for daily, weekly, or bi-weekly plans.
Next, define the theme or topic for each post. Aligning these with your brand’s message helps in building a coherent identity. You should also include calls to action for better engagement. Requests like “Share your thoughts!” encourage user interaction.
Finally, you want to track your analytics. After the posts are live, analyze their performance. This data informs you about what resonates with your audience. Adjust your strategy accordingly to improve engagement over time.
Here’s a table outlining some key components for your reference:
| Component | Description |
|---|---|
| Content Type | Identify what type of content to share. |
| Platform | Choose the platforms for your posts. |
| Publishing Schedule | Outline how often to post. |
| Post Theme | Define topics aligned with your brand. |
| Analytics Tracking | Monitor post performance for improvements. |
By keeping these components in mind, you’ll create an effective calendar.
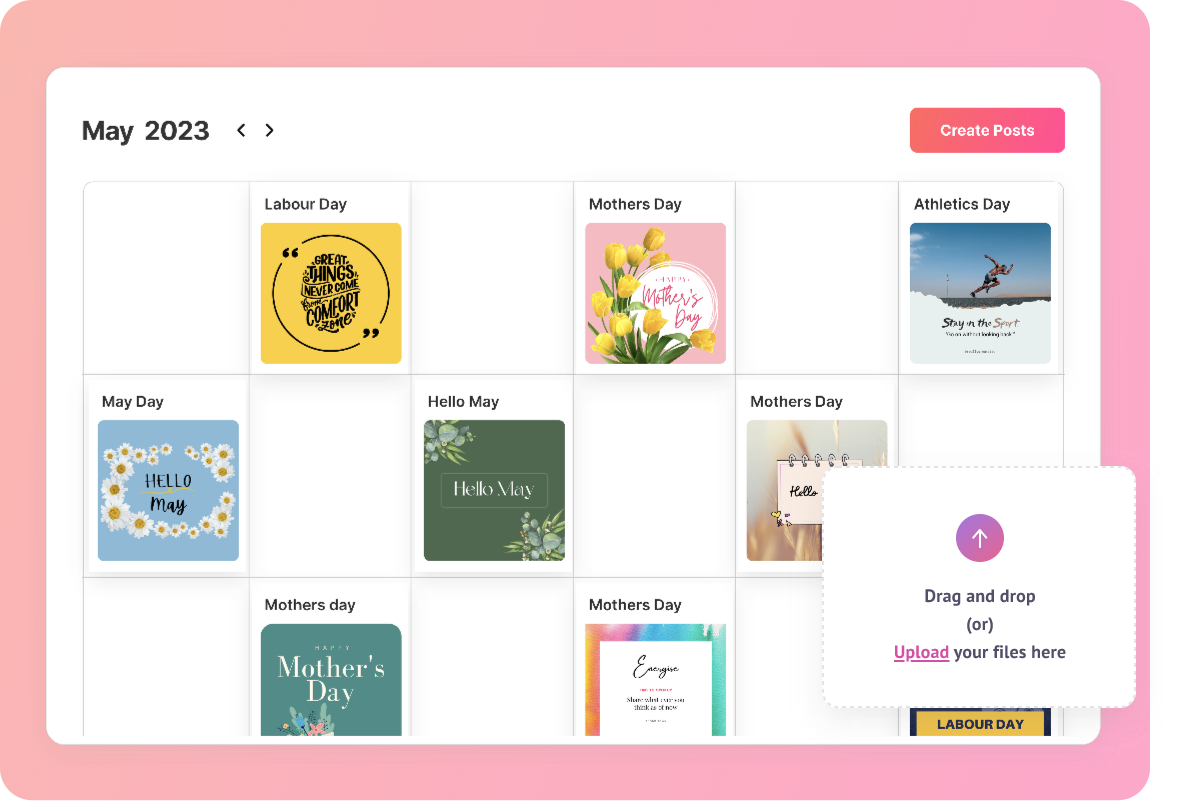
Step 1: Setting Up Your Calendar Structure
To start creating your social media calendar, choose a template. Picmaker offers various calendar templates that are easy to use. This will save time & give you a professional look right away.
Start with a simple structure. Include the basic elements: date, content type, post copy, & images needed. You can create this in a spreadsheet or use dedicated tools.
For spreadsheets, Google Sheets or Excel works well. Create columns for each component. For example:
- Date
- Content Type
- Post Copy
- Platform
- Images or Media Links
Using templates saves time & keeps your focus on content creation. Once you have your basic layout set up, the details come next.
It’s essential to keep your structure simple. A clean & organized layout makes it easier to track changes. Color-code different types of posts for quick identification.
After structuring your calendar, start populating it with your content ideas. Dedicate a specific time each week or month to add new posts. This habit will keep your calendar updated & vibrant.
By structuring your calendar properly from the start, you set the foundation for effective content management.
Step 2: Content Planning for Different Platforms
Next, you need to plan content for different social media platforms. Each platform has different audience interactions, which influence how you craft your posts.
For example, Instagram thrives on visual content. It’s perfect for showcasing products or behind-the-scenes glimpses. High-quality images & engaging captions are key here. Conversely, Twitter is more about real-time updates & concise messaging.
On Facebook, you have the freedom to share longer posts, links, & videos. It is a great platform for storytelling. LinkedIn focuses on professional development. Sharing industry news, articles, & insights works best.
Here’s a quick breakdown in table form:
| Platform | Content Type |
|---|---|
| Visuals, Stories, Reels | |
| Short Updates, Polls | |
| Longer Text, Videos, Events | |
| Professional Articles, Upskilling Content |
Align your content with each platform’s strengths. Think about what engages your audience most. Include a mix of promotional content & value-driven posts. This balance helps keep your followers engaged.
Don’t forget to keep a theme for your content. You can align themes with seasonal trends, holidays, or company events. This approach enhances relevance & makes planning easier.
Each time you level up your content for specific platforms, you’ll notice a boost in engagement. Determine the best format for your audience & stick to it.
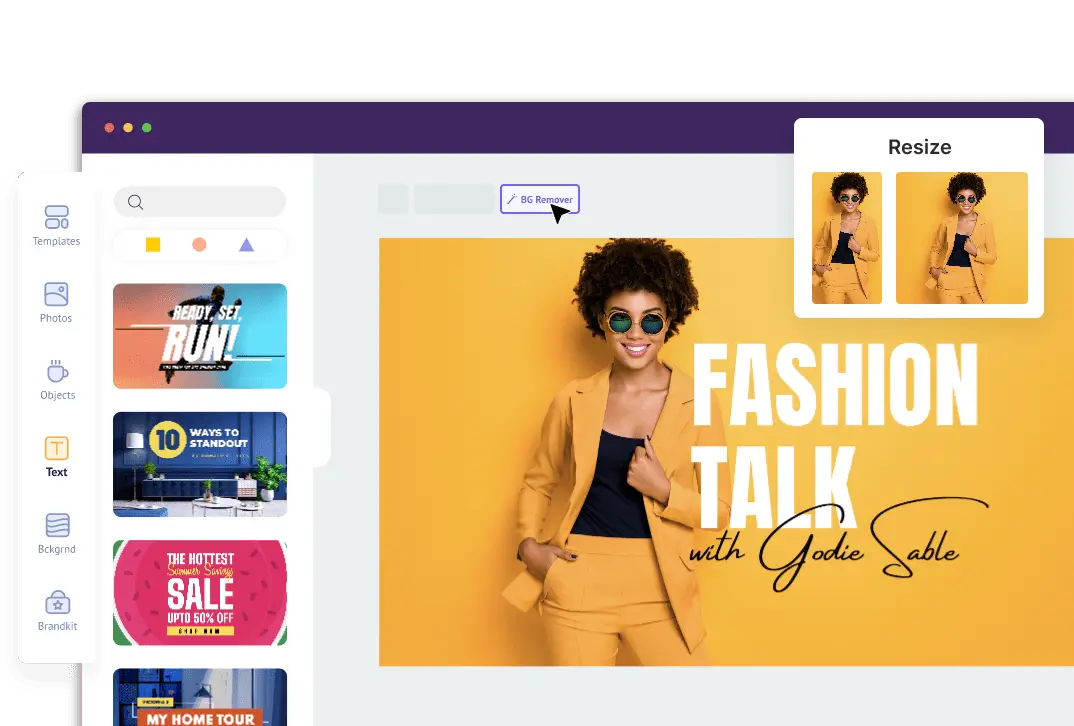
Step 3: Designing Posts with Picmaker
Once you have planned your content, it’s time to move on to design. Picmaker allows you to craft stunning visuals that grab attention. Whether it is Instagram posts or Facebook banners, your designs can stand out.
Start by choosing the right dimensions. Each platform has specific size requirements. Picmaker provides templates that are pre-sized for various platforms. This feature is incredibly convenient.
Select a template that fits your brand’s aesthetic. Customize it with your colors, fonts, & logo. This branding consistency enhances recognition.
You can also add imagery that aligns with your message. High-quality images draw users in. Make sure your visuals complement your text. A good balance between them is essential for impact.
Incorporate calls to action in your designs. Phrases like “Learn More” or “Sign Up Now” can encourage interaction.
Here’s a quick list to consider:
- Choose the right dimensions.
- Select brand-consistent templates.
- Customize with colors & fonts.
- Use high-quality images.
- Add calls to action.
After designing your images, download them & store them in an organized folder. This makes it easier to access them when it’s time to post.
Ensure your designs are consistent & on-brand. This practice will enhance your overall social media presence brilliantly.
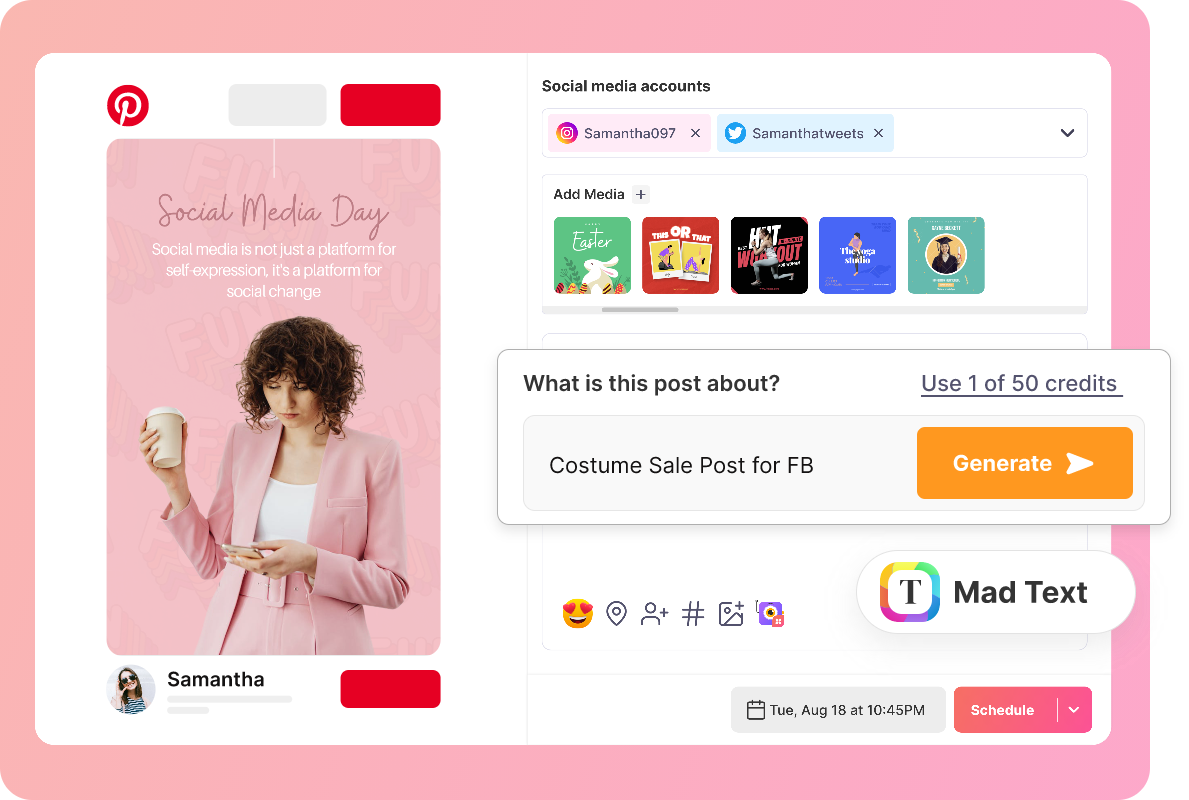
Step 4: Scheduling Your Posts
After designing your social media posts, scheduling them is next. Timely posting is essential for maximizing engagement. There are various tools available for scheduling, such as Hootsuite or Buffer.
These platforms allow you to set specific times for posts. Research shows that certain times yield higher engagement. Analyze your audience’s active hours. Schedule your posts accordingly.
By scheduling posts in advance, you can save time. It allows for a seamless flow in your social media strategy.
Here’s a simple checklist to follow while scheduling:
- Choose optimal posting times.
- Utilize scheduling tools.
- Add captions & hashtags.
- Monitor engagement after posting.
Also, keep an eye on your posts after they’re live. Prompt responses to comments increase engagement.
Setting up reminders for special campaigns helps too. This ensures you’re ready to interact with your audience.
By using scheduling tools effectively, you’ll streamline your process. You will find it easier to maintain a consistent online presence.
Step 5: Analyzing Performance
Analyzing your social media performance is critical for growth. After your posts go live, track their engagement levels. Each platform offers analytic tools to help you evaluate performance.
Key metrics to monitor include likes, shares, comments, & click-through rates. Use this data to determine what content philosophy works best.
You can create a simple table for tracking your metrics, like this one:
| Post Type | Likes | Shares | Comments |
|---|---|---|---|
| Image Post | 200 | 50 | 30 |
| Link Post | 150 | 20 | 10 |
| Video Post | 300 | 80 | 40 |
This performance tracking helps refine your strategy. You can identify high-performing content & replicate it.
Once you evaluate performance, adapt your calendar on a monthly or quarterly basis. This flexibility allows you to stay relevant with evolving trends.
Continual evaluation assists in finding the optimal content that resonates with your audience. Make necessary adjustments to improve your future content.
Tips for Keeping Your Social Media Calendar Updated
To ensure your social media calendar remains effective, keep updating it regularly. Regular revisions are vital. Set aside time each month to review & adjust your calendar as needed.
Stay committed to adding new ideas. This keeps your content fresh & engaging.
Use themes, such as holidays or events, to guide your posts. Your calendar should adapt not only to audience preferences but also to evolving trends.
Here’s a quick list of tips to maintain your calendar:
- Review & adjust monthly.
- Commit to regular brainstorming sessions.
- Incorporate timely events & themes.
- Stay aware of trending topics.
- Engage with your audience for feedback.
Feedback can lead to new content ideas. This practice enhances engagement & builds community.
Also, don’t forget to celebrate milestones or accomplishments. Highlighting these moments enhances your brand’s story.
By staying proactive, your social media calendar will thrive effectively.
“Creating a social media calendar with Picmaker completely transformed my approach to content planning.” – Sarah Johnson
<<<<< Buy Now from Official offer >>>>>
Features of Picmaker
Picmaker offers a powerful suite of features that streamline the process of creating visually appealing social media content. Users gain lifetime access once they purchase the platform. This includes all future updates tied to the Pro Plan. If the plan name changes, the deal correlates to the new name with all updates preserved. Activation must occur within 60 days of purchase. And don’t forget, users can upgrade or downgrade between five different license tiers while the deal remains available.
Picmaker prioritizes user data privacy by being GDPR compliant. Previous AppSumo customers have the opportunity to upgrade their licenses, which allows for an increase in feature limits. They will also be grandfathered into any new features that may emerge in the platform. Notably, each user has access to one Pro workspace free of watermarks. Premium design templates, texts, icons, images, & fonts bring an elevated level of professionalism to creations.
Within Picmaker, premium design features enable scheduling & publishing posts directly to social media accounts. Users also benefit from advanced social analytics & reporting. The three core functionalities include Picmaker Create, Picmaker Manage, & Picmaker Market:
- Picmaker Create: Build stunning graphics & visuals effortlessly.
- Picmaker Manage: Oversee content & calendar schedules.
- Picmaker Market: Analyze social media performance metrics.
Challenges of Picmaker
Despite its numerous strengths, users may face challenges using Picmaker. Some of these include limitations in certain features compared to competitors. For instance, while it offers a wealth of templates & design tools, some users have reported a lack of variety in certain niche categories. Occasionally, specific design elements might not align with the latest trends seen on prominent platforms.
Another common challenge involves compatibility issues. Some users encounter difficulties when trying to integrate Picmaker with specific social media platforms. This can lead to frustration, particularly for marketers & businesses relying on quick operations. The interface may require a brief adjustment period for users unfamiliar with content scheduling tools.
Feedback from users often highlights these challenges. Solutions may require users to explore workaround methods or even reach out to customer support for assistance. Regularly updating the app may also help in addressing compatibility issues.
Price of Picmaker
Understanding the pricing structure is crucial for potential users. Picmaker offers different tiers. Below is the pricing information presented in a table format:
| License Tier | Price |
|---|---|
| License Tier 1 | $69 |
| License Tier 2 | $139 |
| License Tier 3 | $199 |
These pricing options grant access to different levels of service & features, making it important to evaluate which tier aligns with user needs & expectations.
Limitations of Picmaker
Picmaker also has certain limitations. Some users find the tool less intuitive compared to other graphic design platforms. The learning curve can be steep for beginners, as the interface might not be as straightforward. Features such as real-time collaboration may be limited, affecting teams working remotely.
On top of that, while the premium templates are impressive, the overall selection might fall short for professionals seeking extensive customization. Users often desire more advanced features, such as animation options or video editing capabilities. This limits the platform’s appeal to those wishing to produce diverse media formats.
Lastly, occasional performance lags have been reported, especially during peak usage times. To improve this, consistent software updates & enhancements would be optimal.
Case Studies
To highlight the effectiveness of Picmaker, let’s examine a few successful implementations. In one scenario, a digital marketing agency leveraged Picmaker for consistent client content. They effectively scheduled & crafted graphics, which increased their social media engagement by 50% over three months.
Another case involved a small business that used Picmaker to create a series of promotional graphics for a product launch. Their tailored calendar helped align their marketing efforts, leading to a 25% growth in product sales within just a few weeks.
And another thing, a nonprofit organization utilized Picmaker for awareness campaigns. They successfully managed their content schedules & monitored engagement metrics, resulting in heightened community involvement & support for their initiatives. Users report that these practical applications showcase the tool’s strengths & versatility.
Recommendations for Picmaker
To maximize the use of Picmaker, consider the following recommendations. First, always explore the vast selection of templates & design resources available. Customizing existing templates can save time while still producing high-quality visuals.
Second, take full advantage of the scheduling features. Create a calendar that covers your entire month’s content. This organized approach will streamline your posting, ensuring consistency across platforms.
And another thing, integrating Picmaker with other tools can improve workflow. For instance, utilize project management software to keep track of ongoing campaigns & deadlines. Collaborative tools can enhance feedback loops among team members.
Essential Tools for Social Media Calendar Creation
- Social Media Management Tools
- Graphic Design Software
- Content Planning Platforms
- Analytical Tools for Tracking Engagement
- Email Marketing Software
Key Benefits of Using Picmaker
- Lifetime access with continuous updates
- GDPR compliance for data protection
- Premium design tools without watermarks
- Robust scheduling functionality
- Access to advanced analytics & insights
Maximizing Benefits from Advanced Features
- Utilize advanced scheduling options for specific times
- Analyze performance data regularly
- Stay updated with new features & templates
- Engage with community feedback for improvements
- Experiment with design variations to enhance creativity
What is a social media calendar?
A social media calendar is a tool that helps you plan & schedule your social media content in advance. It allows you to organize posts, track deadlines, & manage your overall strategy effectively.
Why should I create a social media calendar?
Creating a social media calendar ensures consistency in your postings, helps you align content with marketing goals, & saves time by allowing you to batch create posts.
How does Picmaker assist in creating a social media calendar?
Picmaker offers user-friendly templates & design tools that allow you to create visually appealing social media graphics, perfect for your calendar.
What steps are involved in creating a social media calendar with Picmaker?
The steps include determining your posting frequency, planning content themes, creating graphics using Picmaker, & scheduling posts on the desired platforms.
Can I customize my social media calendar using Picmaker?
Yes, Picmaker allows for extensive customization, enabling you to tailor graphics & layouts according to your brand’s identity & preferences.
What types of content should be included in my social media calendar?
Your social media calendar should include various content types, such as promotional posts, educational content, user-generated content, & seasonal themes to keep your audience engaged.
How can I ensure my posts align with my marketing strategy?
To ensure alignment, regularly review your marketing goals & incorporate relevant themes & campaigns into your social media calendar.
Is it necessary to track the performance of my posts?
Yes, tracking performance is crucial. It helps you analyze what content resonates with your audience & allows you to optimize future posts in your social media calendar.
Can I collaborate with my team on a social media calendar?
Absolutely! Collaborating with your team on a social media calendar can enhance creativity & ensure that everyone’s ideas are integrated into your content strategy.
What tools can I use alongside Picmaker for scheduling my posts?
There are several tools available for scheduling posts, including Buffer, Hootsuite, & Later, which can complement your work with Picmaker.
<<<<< Buy Now from Official offer >>>>>
Conclusion
Creating a Social Media Calendar with Picmaker is an easy & effective way to boost your online presence. By following this step-by-step guide, you can plan, organize, & manage your content effortlessly. Remember, consistency is key in social media, & a calendar helps keep you on track. Don’t forget to experiment with different designs & schedules to find what works best for you. With Picmaker, you’ll have the tools you need to create engaging posts that resonate with your audience. Get started today & watch your social media thrive!
<<<<< Buy Now from Official offer >>>>>