Step-by-Step Guide to Installing WordPress Plugins for Enhanced Functionality. Looking to boost your site? Dive into our Step-by-Step Guide for installing WordPress Plugins easily & enhance your site’s functionality today!

<<<<< Buy Now from Official offer >>>>>
Why Use WordPress Plugins?
WordPress plugins are vital tools for enhancing your website’s functionality. They allow you to add features without coding. For instance, a contact form, SEO tools, & social media sharing buttons are all manageable with plugins. Using these tools makes your site more user-friendly & engaging.
Many users wonder about the need for plugins. An effective plugin can solve specific problems. It saves time & effort. WordPress offers thousands of options. This wide range empowers users to customize their sites to meet unique needs. You can choose plugins based on performance, security, or design.
Here’s a list of compelling reasons to use plugins:
- Enhances site functionality
- Improves user experience
- Optimizes content for search engines
- Allows for advanced analytics
- Increases site speed & performance
Installing the right plugins can elevate your site’s overall effectiveness. Be that as it may, with so many choices, selecting plugins may feel overwhelming. This guide breaks down how to install & manage them easily.
Finding the Perfect WordPress Plugin
Selecting the right plugin requires a methodical approach. You should first identify your needs. Do you want better SEO, enhanced security, or easier content creation? Knowing what you want helps streamline your search.
Start by browsing the official WordPress Plugin Directory. It offers thousands of options. Use the search feature for specific functionalities. Reading reviews also gives insight into plugin performance.
Some essential factors to consider:
- User ratings & reviews
- Active installations
- Update frequency
- Support & documentation
- Compatibility with your WordPress version
Also, consider the plugin’s performance impact on your site. Some plugins can slow down website speed. Checking compatibility is crucial. If unsure, you may consult with a developer.
Here’s a simple table to show factors influencing your choice:
| Factor | Importance Level |
|---|---|
| User Ratings | High |
| Active Installations | Medium |
| Update Frequency | High |
| Support Availability | Medium |
By following this method, you can narrow down your plugin options efficiently. Make sure to check for any potential risks, especially with security-focused plugins.
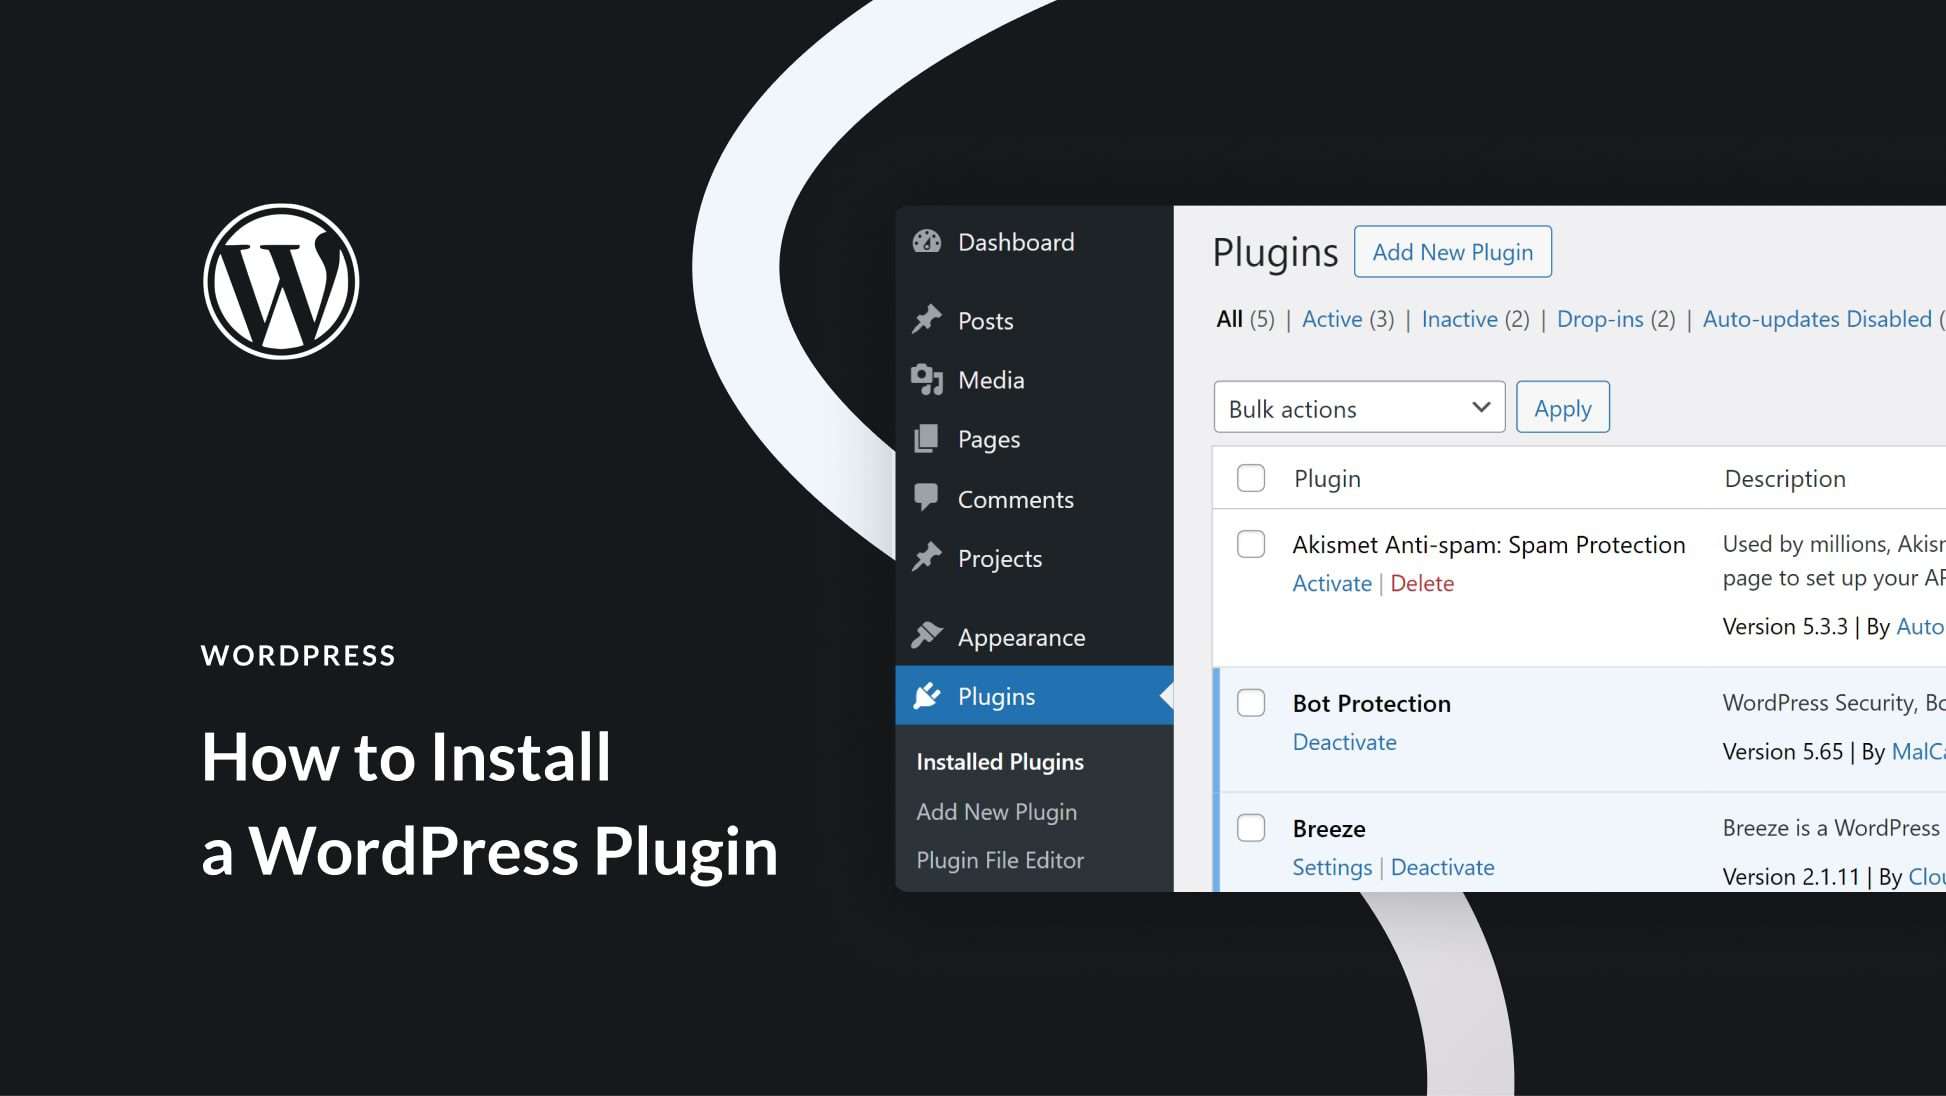
Installing a WordPress Plugin via the Dashboard
Installing a plugin through the WordPress Dashboard is an easy process. First, log into your WordPress account. Once logged in, follow these simple steps:
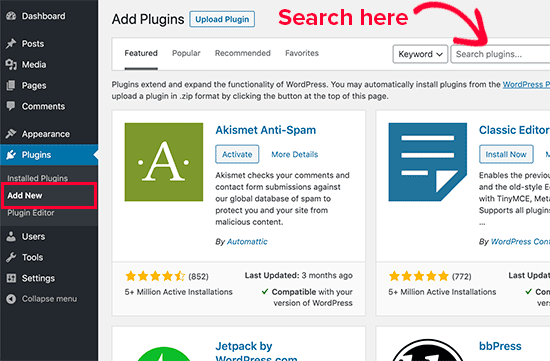
1. From the left menu, click on Plugins.
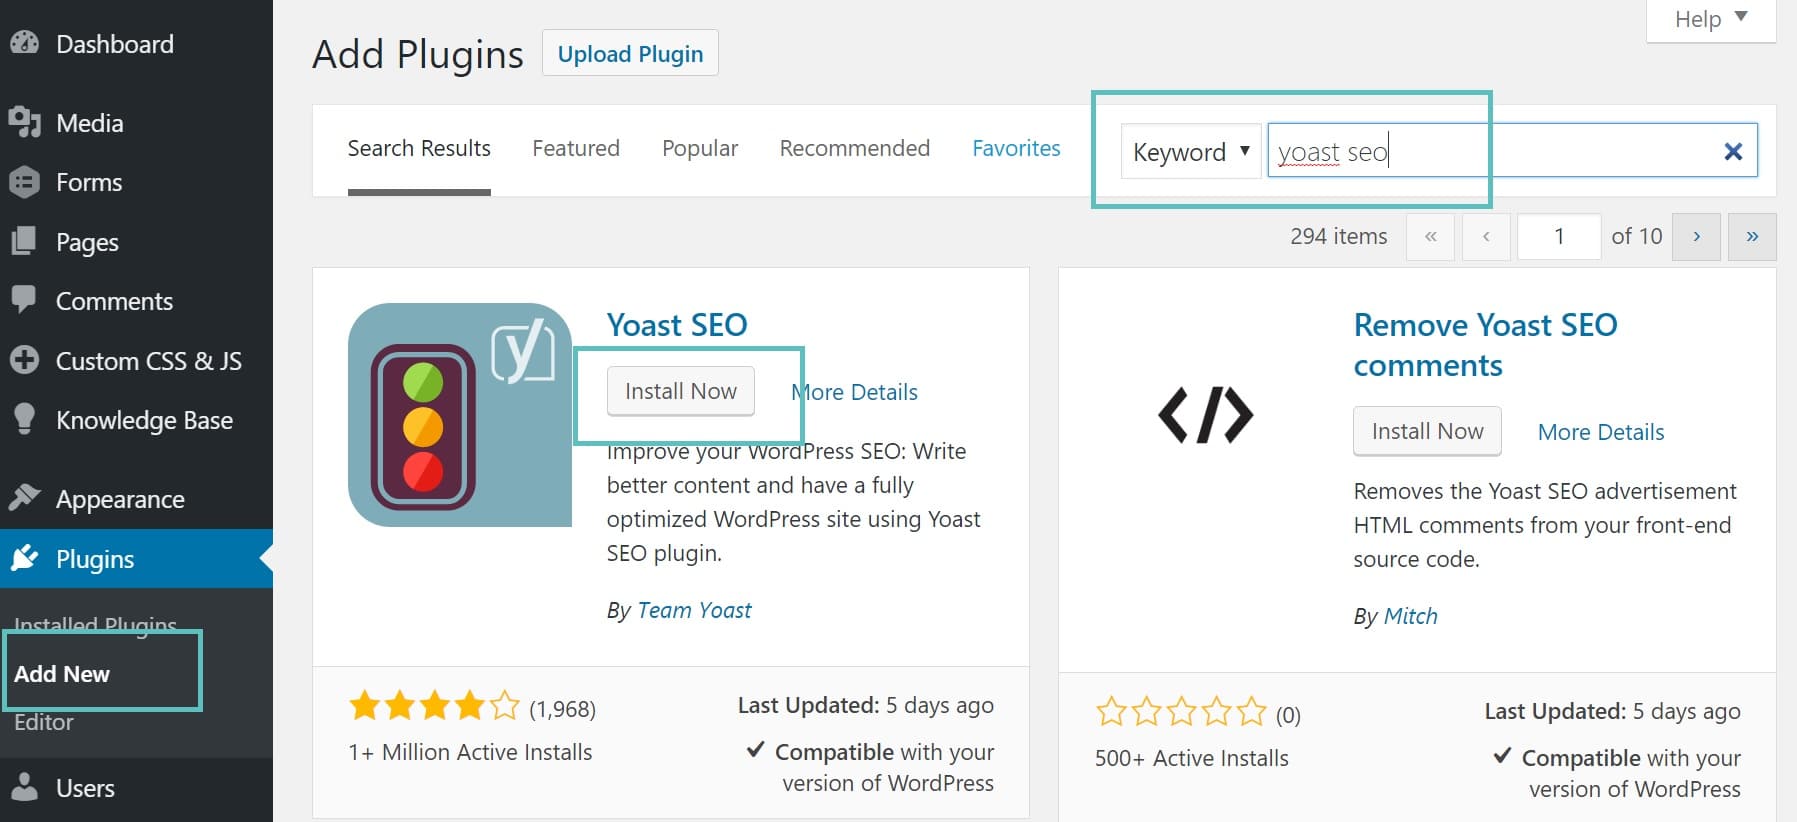
2. Then, click on Add New.
3. Use the search box to find the desired plugin.
4. Once you find it, click Install Now.
5. After installing, click Activate.
This process brings your new plugin to life.
Some popular plugins include:
- Yoast SEO for search engine optimization
- Wordfence Security for protection
- WooCommerce for e-commerce functions
- Contact Form 7 for managing contact forms
After activation, you may notice new menu options in your dashboard. Each plugin typically has its settings page. Configure them according to your preferences.
In my experience, installing plugins via the dashboard is straightforward. I recall using Yoast SEO to improve my site’s visibility. The settings were easy to find, & the navigation was seamless.
Installing a WordPress Plugin Manually
Manual installation is another method for adding plugins. This approach may be beneficial if you downloaded a plugin from another source. Follow these steps:
1. First, download the plugin’s .zip file from the source.
2. Log into your WordPress dashboard.
3. Navigate to Plugins & click on Add New.
4. Instead of searching, click on Upload Plugin.
5. Choose the .zip file you’ve downloaded.
6. Click on Install Now & then Activate.
Manual installation can also be done via FTP. You will need an FTP client for this. Follow these steps:
1. Connect to your website’s server using FTP.
2. Navigate to wp-content/plugins/ folder.
3. Upload the plugin folder (extracted from the .zip file).
4. Log back into your WordPress dashboard.
5. Activate the plugin from the Plugins menu.
Employing FTP can seem technical. Ensure you have FTP access before proceeding. This method also allows for easy backup & management of your plugins.
Here’s a visual representation of both methods:
| Method | Steps Required |
|---|---|
| Dashboard Installation | 6 Steps |
| Manual Installation | 6 Steps (or FTP steps) |
Each method has its advantages. Choose based on your comfort level & the source of your plugins.
Configuring Your Installed Plugins
After installing a plugin, configuration is important. Many plugins have default settings, but customizing them enhances performance. Always review the plugin’s documentation for specific instructions.
Start by finding the settings menu. Usually, it is located under the Plugins section or as a new tab in your dashboard. Adjust settings related to performance, features, & appearance according to your needs.
For instance, if you installed a security plugin like Wordfence, configure its firewall & scan settings. If using an SEO plugin, set up your site’s metadata properly. Missing these can hinder your website’s functionality.
Here’s a checklist for configuring your plugins:
- Read provided documentation
- Adjust settings to suit your goals
- Check for conflicts with other plugins
- Test functionality thoroughly
- Regularly update settings as needed
Configuration can influence how well a plugin performs. Pay attention to details for best results.
Keeping Your Plugins Updated
Regular updates are vital for plugin security & performance. Developers regularly release updates for various reasons. These may include performance enhancements, new features, or security patches.
To update plugins, follow these steps:
1. Go to the Plugins section in your dashboard.
2. You will see updates available listed.
3. Click on Update Now for each plugin.
Here’s a simple table that shows the consequences of not updating plugins:
| Consequence | Description |
|---|---|
| Security Risks | Vulnerabilities may be exploited |
| Compatibility Issues | May not work well with WordPress updates |
| Performance Decline | Older versions may slow down the site |
Remember to always back up your site before updating plugins. This practice protects your content from any unexpected issues. Keeping plugins up-to-date ensures optimal performance.
Removing Unnecessary Plugins
Uninstalling plugins you no longer need is essential for maintaining site health. Too many plugins can slow your site. Remove unwanted plugins regularly to keep things clean & efficient.
To remove a plugin, simply:
1. Navigate to the Plugins section.
2. Find the plugin you want to remove.
3. Click on Deactivate first, then Delete.
It is a straightforward process that significantly impacts your website’s performance.
Here is a quick checklist for determining if a plugin should be removed:
- No longer being used
- Conflicts with other plugins
- Significantly slows page load time
- Last updated a long time ago
- Poor user ratings or reviews
Remove plugins with caution. Some plugins may leave residual data even after deletion. Check the website thoroughly post-removal.
Troubleshooting Common Plugin Issues
Problems may arise after installing plugins. Understanding how to troubleshoot can save you time. Here are common issues you might encounter:
1. Plugin Conflicts: Sometimes plugins may not work well together. Disable one by one to identify issues.
2. Site Speed: Some plugins may sluggish performance. Use speed tests to identify culprits.
3. Error Messages: If you see error messages on your site, disabling all plugins can help identify the problematic one.
In addition to these methods, consider the following steps for resolving plugin issues:
- Check plugin documentation or support forums
- Clear the site cache
- Update WordPress to the latest version
- Contact your hosting provider for server-related issues
Staying proactive helps maintain site integrity & performance. Ensure you regularly check for solutions to any potential concerns.
Using Multisite for Plugin Management
If you’re managing multiple WordPress sites, consider using Multisite for plugin management. This feature allows you to run several websites under one WordPress installation. It simplifies plugin installation & management significantly.
When using Multisite, follow these steps to install plugins:
1. Log into the Network Admin dashboard.
2. Click on Plugins & then Add New.
3. Search for & install the desired plugin.
4. Activate it across sites or individually.
Here’s a summary of benefits related to Multisite:
| Benefit | Description |
|---|---|
| Centralized Management | Manage all sites from one dashboard |
| Easy Plugin Updates | Update all sites simultaneously |
| Resource Sharing | Share resources among sites |
Multisite is an efficient way to handle multiple websites. It simplifies the management process significantly.
Conclusion & Best Practices
Using WordPress plugins effectively can significantly enhance your website’s functionality. Remember to choose, install, configure, update, & manage plugins wisely. This ensures you get the most benefit out of each tool.
Many users find themselves overwhelmed by choices. Remember to start softly by identifying your needs. Regular maintenance is crucial for the health of your entire website.
Lastly, always keep your site backed up before making significant changes. A well-maintained WordPress site with properly managed plugins can lead to greater success.
“Managing plugins wisely can transform your WordPress experience.” – Sarah Mitchell
<<<<< Buy Now from Official offer >>>>>
Feature of WP Reset Pro Plan
WP Reset Pro Plan offers a comprehensive set of features designed to ensure optimal site management & recovery for WordPress users. Below are the key features:
- Lifetime access to WP Reset.
- All future Pro Plan updates included.
- Plan names will change; old purchases will map to new names with corresponding updates.
- No codes, no stacking just select the plan that suits the user best.
- License activation required within 60 days of purchase.
- Flexible ability to upgrade or downgrade among three license tiers.
- GDPR compliant, ensuring data privacy & protection.
- Previous AppSumo customers can upgrade to increase feature limits.
- Grandfathering in for existing AppSumo customers regarding new limits.
- Over 25 tools to enhance the WordPress experience.
- Snapshots & auto snapshots for easy recovery.
- Collections for plugins & themes.
- Emergency recovery script for critical situations.
- Access to a user-friendly WP Reset dashboard.
- Each Cloud site license includes 3 GB storage.
- License manager for organized handling.
Challenges of WP Reset Pro Plan
Using WP Reset Pro Plan may come with certain challenges. Users might encounter limitations in some features that other alternatives offer. Some functionalities may not be as robust. For example, auto snapshots might not always capture every desired moment. Users have reported instances where these snapshots lacked necessary components.
Compatibility issues can arise, particularly when plugins & themes are updated frequently. Users have found some plugins conflicting, which led to site performance issues. This can be frustrating for newcomers unfamiliar with troubleshooting processes.
Learning curves may also affect users as they get acquainted with the dashboard & features. Transitioning from standard WordPress management tools to WP Reset Pro can be slightly overwhelming initially. Users have suggested creating more tutorials & better documentation for newcomers to mitigate this issue.
Price of WP Reset Pro Plan
Pricing for WP Reset Pro Plan is structured into three distinct tiers, accommodating various user needs. Below is the price overview:
| License Tier | Price |
|---|---|
| License Tier 1 | $49 |
| License Tier 2 | $129 |
| License Tier 3 | $299 |
Limitations of WP Reset Pro Plan
Despite its many advantages, WP Reset Pro Plan does have certain limitations. Notably, some users find the feature set lacking compared to competitors. While it includes essential tools, advanced functionalities may be absent. This could limit tasks for users who require more intensive management tools.
User experience appears to be a mixed bag. A few users mentioned that the interface can be unintuitive, especially for beginners. This has led to confusion in navigating available features & options. Improvements in user interface simplicity could benefit overall user satisfaction.
There are also reports suggesting that certain tools may not perform optimally under specific server configurations. Customers have indicated frustration when their hosting environment doesn’t support recommended settings for WP Reset functionalities.
Case Studies
Numerous users have documented their experiences with WP Reset Pro Plan, showcasing successful use cases. For instance, a small business owner noted significant improvements in managing their website. The individual utilized snapshots to revert to a stable version after a failed plugin installation.
Another user, a freelance web developer, shared how the emergency recovery script saved several projects. This feature allowed for rapid restoration after a website crash, significantly reducing downtime & maintaining client trust.
A non-profit organization highlighted efficient theme management via collections, enabling them to streamline updates across multiple sites. By leveraging the ability to manage themes collectively, they ensured consistent branding & messaging.
Recommendations for WP Reset Pro Plan
To maximize benefits from WP Reset Pro Plan, users should consider the following strategies:
- Utilize the backup feature regularly to avoid data loss.
- Explore all available tools to fully understand their functionalities.
- Stay updated on plugin compatibility before deployment.
- Engage with the community for shared knowledge & experiences.
- Regularly check for updates & upgrade plans as necessary.
- Incorporate additional management tools that align with WP Reset.
- Participate in training sessions provided by WP Reset for skill enhancement.
Essential WP Reset Tools
- Snapshots
- Emergency recovery script
- Plugin collections
- Theme management tools
- Auto snapshot feature
What are WordPress plugins?
WordPress plugins are software add-ons that can be installed on a WordPress site to extend its functionality. They allow users to add new features without modifying the core code.
How do I find a plugin to install?
You can find plugins by visiting the WordPress Plugin Directory or by searching within your WordPress dashboard under Plugins > Add New. You can explore popular, recommended, or featured plugins.
How do I install a WordPress plugin using the dashboard?
To install a plugin via the dashboard, go to Plugins > Add New, search for the desired plugin, click on ‘Install Now,’ & then activate it once installed.
Can I upload a plugin manually?
Yes, you can manually upload a plugin by downloading the plugin .zip file, going to Plugins > Add New, clicking on ‘Upload Plugin,’ choosing the .zip file, & then installing it.
What should I consider before installing a plugin?
Before installing a plugin, check its ratings, reviews, last updated date, compatibility with your current WordPress version, & active installation count to ensure it is reliable.
How do I activate a plugin after installation?
After installation, go to the Plugins list, find the new plugin, & click the ‘Activate’ button to enable it on your site.
How can I deactivate or delete a plugin?
To deactivate a plugin, go to Plugins, find the plugin you want to deactivate, & click ‘Deactivate.’ To delete, first deactivate it, then click ‘Delete’ to remove it from your site.
What are the risks of using too many plugins?
Using too many plugins can lead to site performance issues, potential conflicts between plugins, & security vulnerabilities. It is essential to keep plugins to a minimum.
How often should I update my plugins?
You should regularly check for updates & update your plugins whenever new versions are available to ensure security & compatibility with newer WordPress versions.
Are there any plugins that I shouldn’t use?
Avoid plugins that haven’t been updated in a long time, have poor reviews, or lack support from their developers, as they may pose security risks.
What functionalities can plugins add to my WordPress site?
Plugins can add a variety of functionalities including SEO optimization, social media integration, contact forms, sliders, performance enhancements, & e-commerce capabilities.
How do I troubleshoot a problem with a plugin?
If a plugin causes issues, deactivate it & see if the problem resolves. You can also check for conflicts with other plugins or themes, & consult the plugin’s support page for assistance.
<<<<< Buy Now from Official offer >>>>>
Conclusion
In conclusion, installing WordPress plugins is an easy way to boost your site’s functionality. By following this simple step-by-step guide, you can enhance your website with amazing features that will improve user experience. Remember to choose plugins that suit your needs & ensure they are regularly updated for optimal performance. Once you understand the installation process, you’ll find it quick & straightforward. So, roll up your sleeves, dive in, & start exploring the endless possibilities with your new WordPress plugins. Happy blogging & enjoy your enhanced website!
<<<<< Buy Now from Official offer >>>>>